Visual Studio Code + Miniconda + R
I spend a lot of time doing data analysis in R, as well as writing and editing Python, JSON, Markdown, and various other formats. In my search to find a single application that could cover most of my needs well enough, I’ve landed on a setup of Visual Studio Code with Miniconda and R that works really well for my needs. While I’d prefer a more mac-assed mac app, Visual Studio Code is performant, and the flexibility it offers has been a good trade-off for me. I like using conda (via Miniconda) because it manages packages across R, Python, and several other ecosystems I use, without feeling like it’s making a big mess of my system.
This post is a high-level outline of my thinking and the steps I took to get this setup working. Importantly, these steps are all based on my system (an M1 MacBook Pro running macOS 13.1 Ventura), but they should translate to other systems. I’ve assumed in this guide that you’re broadly familiar with installing software on your system and the command line.
Miniconda
First, install Miniconda. You’ll want to download the appropriate installer from conda.io. In my case, I selected the “Miniconda3 macOS Apple M1 64-bit pkg” package.
One preference I’ve got is to keep Miniconda in my user’s Applications folder. To do this, at the Select a Destination step, choose Install on a specific disk… Then select Choose Folder… and select the Applications folder in your home folder. If this folder doesn’t exist, you can create an Applications folder, or choose another location you’d prefer. In my case, Miniconda will be installed in /Users/cody/Applications/miniconda3.
Once installation is complete, you can open Terminal.app and you should now notice that your terminal is prefixed with the (base) environment. I prefer to not have this environment activated by default, so I disable that by running the following command in Terminal.app:
conda config --set auto_activate_base False
Create Conda Environment
There are many ways to set up your conda environments, and you can create these and install packages on an ad-hoc basis. I tend to use one main environment for most data analytics called analysis, which I specify in a file analysis.yml:
name: analysis
channels:
  - conda-forge
  - defaults
dependencies:
  - r-base
  - radian
  - r-languageserver
  - r-tidyverse
The file above is a good place to get started, enabling the conda-forge repository and a few basic packages to get going with this setup. Note that this will install R in your environment as well.
Once you’ve created this file, you can run conda env create --file analysis.yml to create the environment. Note that you may be prompted to install the Xcode developer tools, which you’ll need to do to continue.
Visual Studio Code
Next up you will download the appropriate VSCode for your system—the .zip for Apple Silicon in my case. Unzip the downloaded file, drag the application package to your Applications folder, and launch it.
To install the R extension, click the Extensions tab in the left sidebar, search for R, and click Install. Once it’s installed, you’ll want to set up a few settings to get R set up for your conda environment. Click the gear icon in the R extension pane, and click Extension Settings. Configure the following settings, adjusting for your platform and conda path and environment name:
- Enable Bracketed Paste
- Rpath: Mac —
/Users/cody/Applications/miniconda3/envs/analysis/bin/R - Rterm: Mac —
/Users/cody/Applications/miniconda3/envs/analysis/bin/radian - Rterm: Option — Add
--r-binary=/Users/cody/Applications/miniconda3/envs/analysis/bin/R
Test It Out
The magic of this setup really comes from using .Rmd files, but .R files are of course supported as well.
Create a sample .Rmd file as below:
---
title: Test File
---

```{r}
summary(iris)
```
If everything is set up correctly, you’ll get a Run Chunk button above the code chunk, and in another pane you will see R launch and run a summary of the iris dataset.
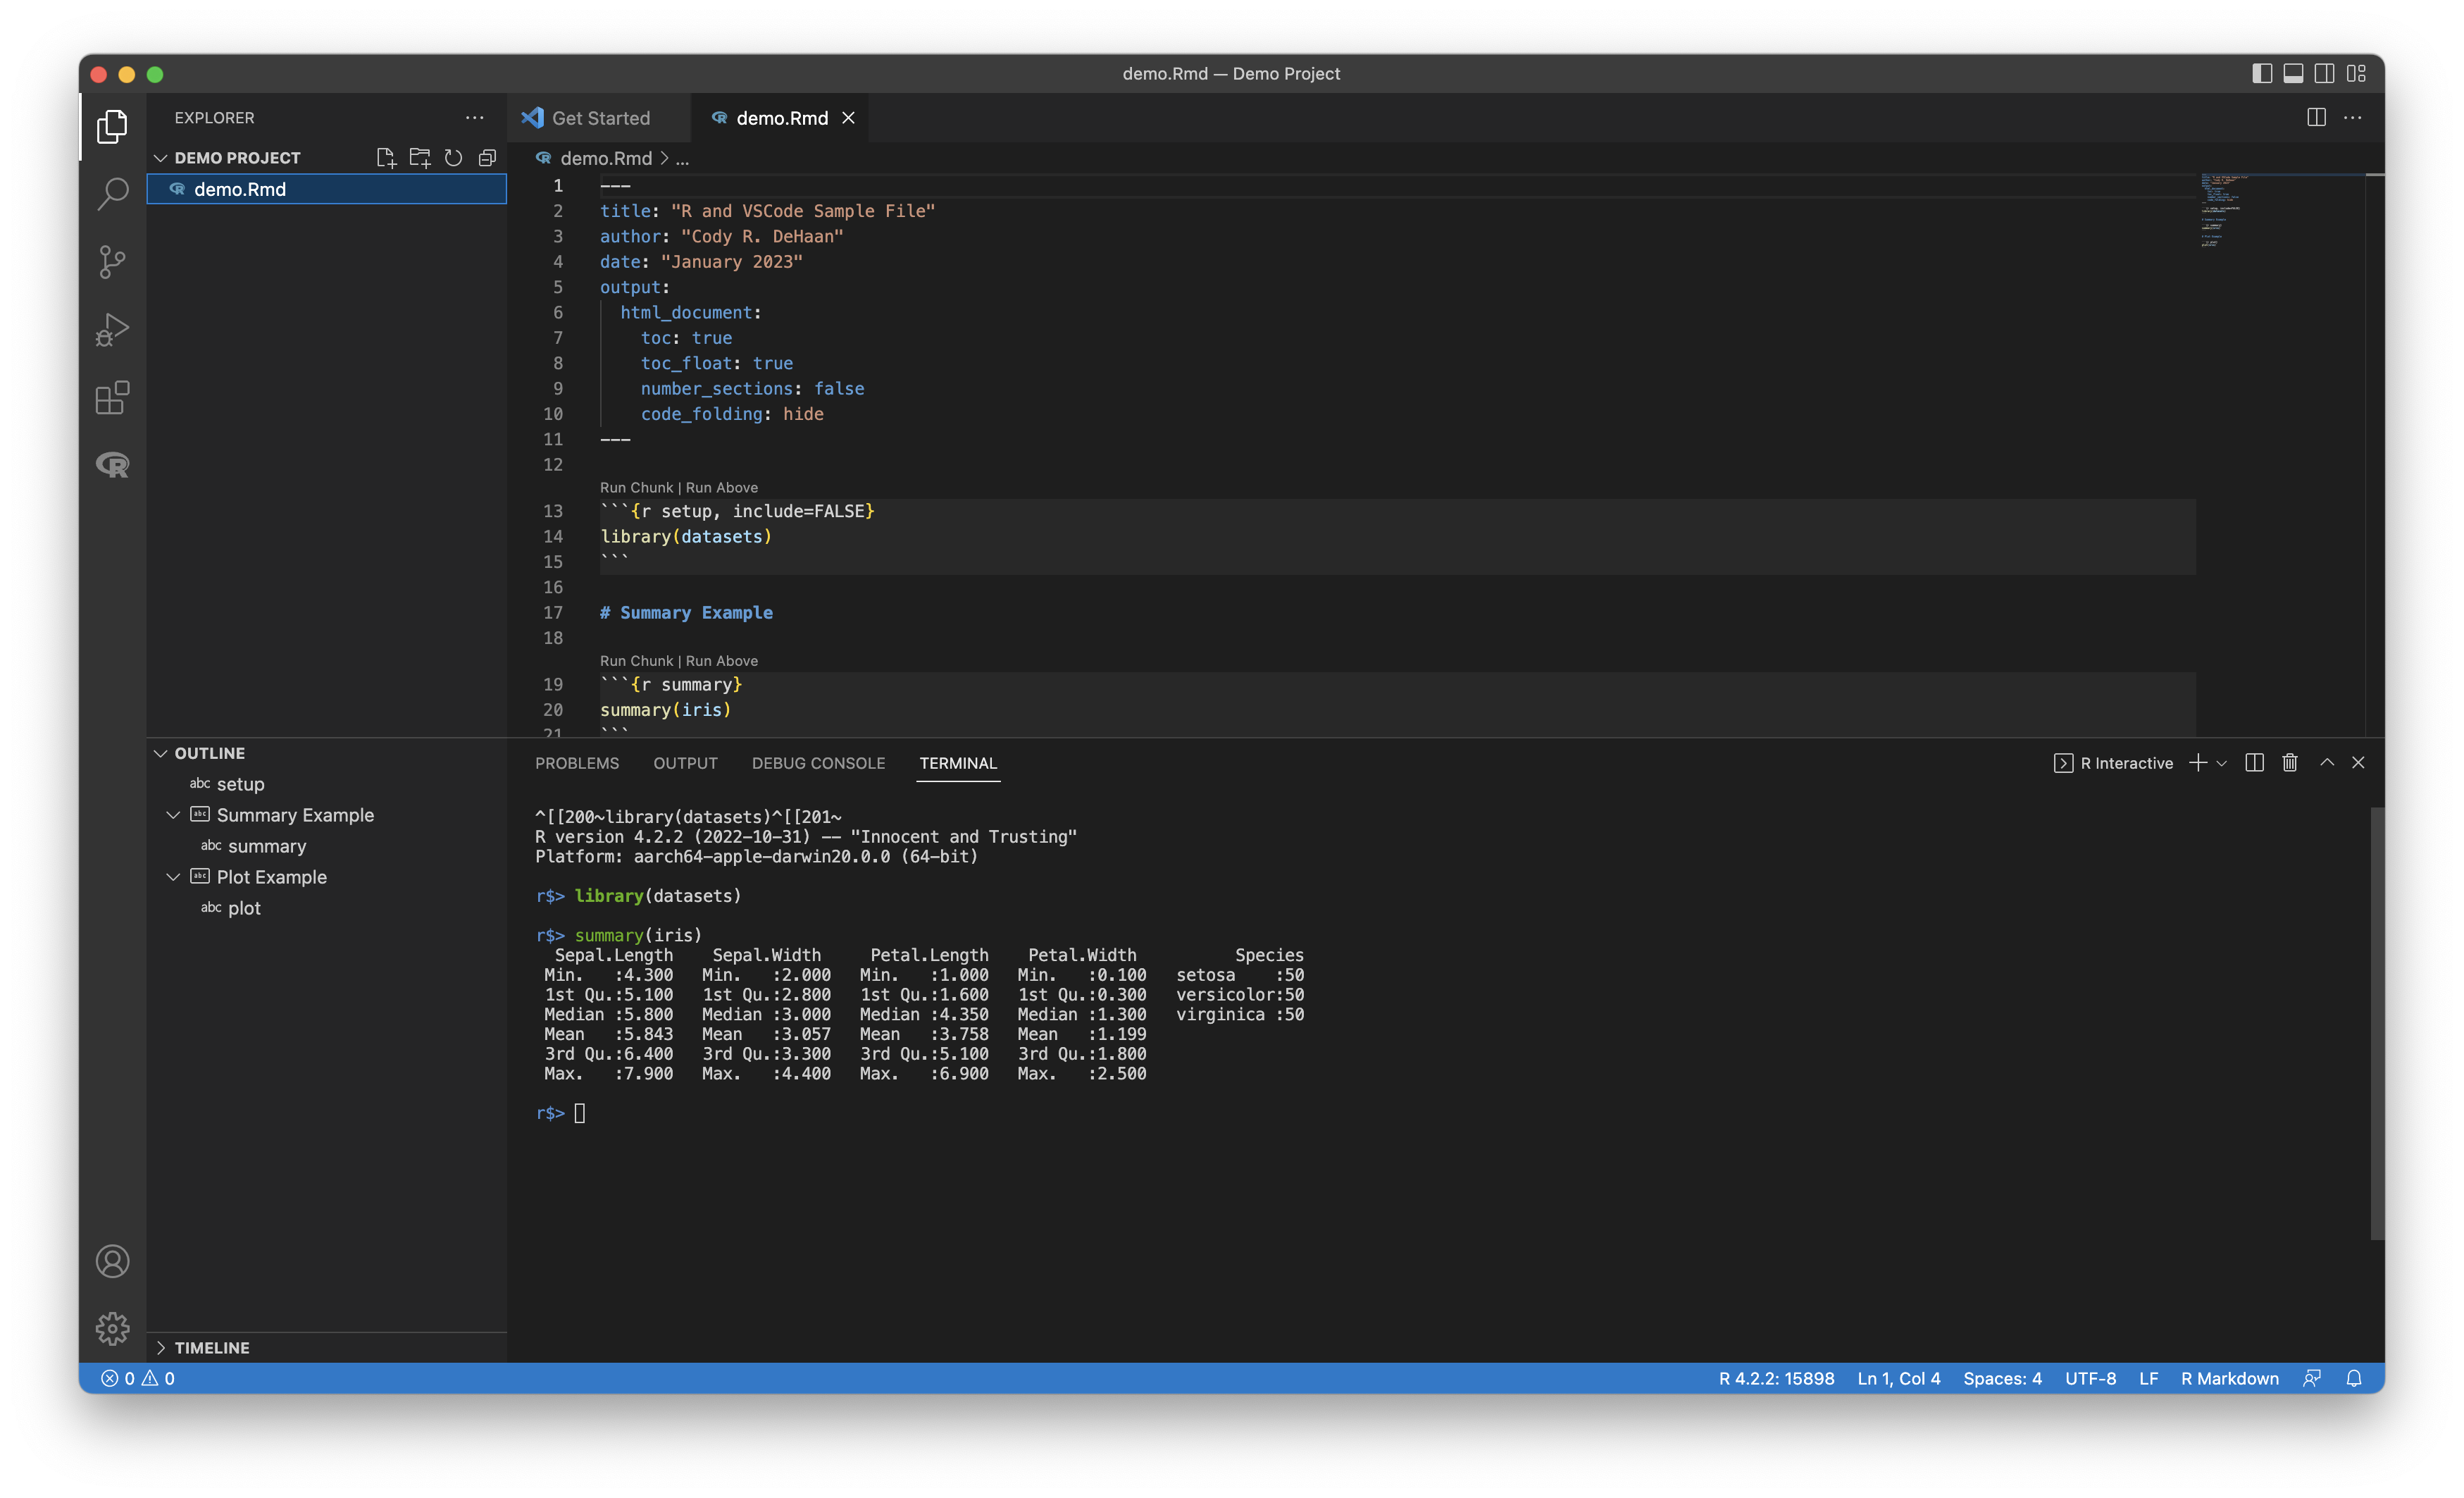
Example of .Rmd file
Installing Additional Packages
When you need to add additional R packages, you can install them using the traditional install.packages() approach, but I recommend checking anaconda.org first. You can search for r packages, such as psych, by searching for ‘r-psych’. If the package is available, you can add it to the dependencies section of your analysis.yml file. Then run conda env update --file environment.yml.
Tip: Check the anaconda.org search results for your architecture. Intel Macs will be listed as osx-64, Apple Silicon macs as osx-arm64, and noarch packages will work on both.
Some packages aren’t available on anaconda, or won’t be available for your architecture, and will require installing through install.packages() in an R session. With Apple Silicon, I’ve run into some problems doing this from a regular R session. However, I’ve found a workaround.
Open Terminal.app, activate your conda environment using conda activate analysis, and launch R with the command arch -arm64 R. You should then be able to use install.packages() as normal.
cody@Codys-MBP ~ % conda activate analysis
(analysis) cody@Codys-MBP ~ % arch -arm64 R

R version 4.2.2 (2022-10-31) -- "Innocent and Trusting"
Copyright (C) 2022 The R Foundation for Statistical Computing
Platform: aarch64-apple-darwin20.0.0 (64-bit)

R is free software and comes with ABSOLUTELY NO WARRANTY.
You are welcome to redistribute it under certain conditions.
Type 'license()' or 'licence()' for distribution details.

  Natural language support but running in an English locale

R is a collaborative project with many contributors.
Type 'contributors()' for more information and
'citation()' on how to cite R or R packages in publications.

Type 'demo()' for some demos, 'help()' for on-line help, or
'help.start()' for an HTML browser interface to help.
Type 'q()' to quit R.

> install.packages("lavaan")
Additional Tips
Command Palette
Open the command palette to quickly navigate the app by typing ⇧⌘P (Shift + Command + P) and search for the setting or window you’d like.
Telemetry
I disable telemetry/analytics in apps when there’s an easy option, and there is in Visual Studio Code. To find it, type settings into the command palette and choose Preference: Open Settings (UI). Then search for “telemetry” in the search bar, and switch the Telemetry Level to Off.
Themes
There are lots of themes available by searching the command palette for “theme” and choosing Preferences: Color Theme. There are many pre-installed, but you can also choose Browse Additional Color Themes… from the top to search for more. My personal favorite is GitHub Light Default from the GitHub Theme package.
Fonts
You can also change your editor fonts, of course. I like the SF Mono font from Apple, which you can download from developer.apple.com. Once you’ve installed it, you can add SFMono-Regular to your Editor: Font Family settings in Visual Studio Code.
Additional Resources
Published on